
Introduction: Why Go DIY with CO₂ Injection?
CO₂ is essential for lush, thriving plant growth in freshwater aquariums. In high-tech setups, aquascapers often use pressurized CO₂ systems with regulators, solenoids, and needle valves. While effective, these systems can be expensive, complex, and intimidating for beginners.
A DIY CO₂ system using yeast and sugar offers a low-cost, beginner-friendly alternative—ideal for tanks under 30 gallons. This system can boost plant growth, improve coloration, and reduce algae—all without breaking the bank.
In this guide, we’ll show U.S.-based aquarists how to build, calibrate, and safely operate a regulator-free CO₂ system at home.
Benefits of DIY CO₂ Injection (Without Regulator)
- Budget-friendly (under $15 to build)
- No pressurized tank or regulator needed
- Effective for low to medium-light tanks Reusable materials and ingredients
Note: While effective, DIY CO₂ may not be ideal for high-demand carpeting plants or high-tech aquascapes.
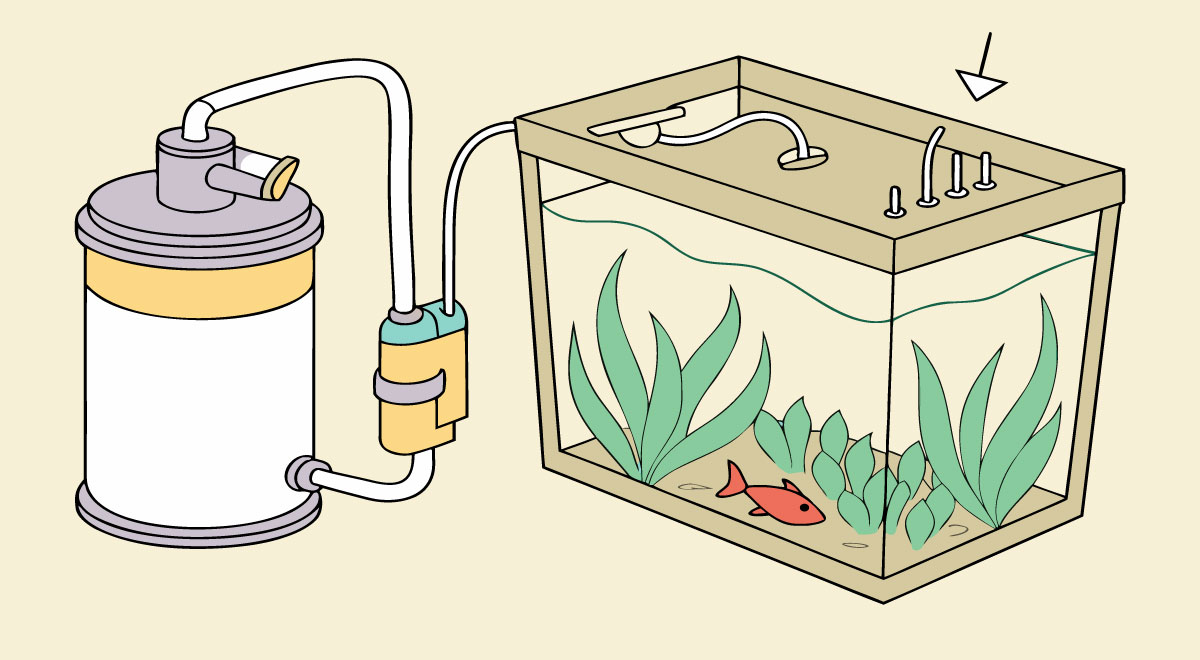
How DIY CO₂ Systems Work
DIY systems rely on a biological reaction: yeast consumes sugar and produces carbon dioxide (CO₂) and alcohol. By capturing the CO₂ and channeling it into your tank, you can naturally enrich your water column.
The Basic Reaction:
C₆H₁₂O₆ (glucose) + yeast → 2C₂H₅OH (alcohol) + 2CO₂ (gas)
Materials Needed (U.S. Readily Available Supplies)
Most supplies can be found in local U.S. stores (Walmart, Home Depot, Petco) or Amazon.
Essentials:
- (2) 1-liter or 2-liter soda bottles (clean and dry)
- Airline tubing (6–10 feet)
- Check valve (prevents backflow)
- Suction cups or airline holders
- CO₂ diffuser or airstone
- Drill or heated nail (for cap holes)
- Optional: bubble counter (small bottle)
Ingredients (Per Bottle):
- 2 cups white sugar
- 1 tsp dry active yeast (Fleischmann’s or generic)
- ½ tsp baking soda (for pH buffering)
- Warm water (around 100°F)
Step-by-Step Assembly Instructions
Step 1: Prepare Bottle A (CO₂ Generator)
- Fill a clean 2L bottle with:
- 2 cups sugar
- ½ tsp baking soda
- Add warm (not hot!) water up to the curve of the bottle
- Stir until dissolved
- Add 1 tsp active dry yeast
- Shake lightly and loosely cap
Step 2: Create Airtight Connection
- Drill a hole in the bottle cap slightly smaller than airline tubing diameter
- Insert airline tubing snugly into the hole
- Seal edges with hot glue or silicone to prevent leaks
Step 3: Add Check Valve
- Cut tubing 6–8 inches from bottle
- Insert check valve with flow direction pointing away from bottle
Step 4: Connect Diffuser or Airstone
- Attach the other end of tubing to an airstone or CO₂ diffuser
- Place diffuser near filter outflow or plant roots for better circulation
Optional Step: Add a Bubble Counter
- Create a mini bottle filled halfway with water
- Route airline tubing through both caps
- Watch for bubbles to track CO₂ flow
Calibrating CO₂ Output (Without a Regulator)
While pressurized setups offer precision via regulators, you can still manually calibrate your DIY setup:
1. Observe Bubble Rate
- Count bubbles per second using the bubble counter
- 1–2 BPS (bubbles per second) is typical for tanks under 20 gallons
2. Adjust with Yeast-Sugar Ratios
- More sugar = longer life
- More yeast = faster start but shorter lifespan
3. Monitor pH and Drop Checker
- Use a drop checker to measure CO₂ concentration
- Target color: green (30 ppm CO₂)
- pH should drop about 0.5–1.0 units (test with API pH kit)
Safety Precautions & Tips
Use a Check Valve
Prevents water from siphoning back into your CO₂ bottle—a common issue during power outages.
Don’t Overfill Bottle
Leave headspace for fermentation gas buildup; overfilling causes pressure spikes and leakage.
Avoid Overdosing
Too much CO₂ = suffocated fish. If fish are gasping at the surface:
- Stop the flow
- Aerate the tank
- Do a partial water change
Refresh Every 2 Weeks
DIY mixtures usually last 10–14 days. For steady output, rotate between two bottles every week.
Performance Tips from U.S. Hobbyists
“Staggered Bottles” Technique
U.S. Tip: In online forums like PlantedTank.net, many hobbyists recommend running two bottles in rotation—start Bottle B one week after Bottle A to maintain stable CO₂ output.
Use a Soda Bottle Cap Kit (Available on Amazon)
Pre-made caps with bulkhead fittings are available from U.S. sellers—these prevent leaks and simplify connection.
Add Gelatin for Slow Release (Optional)
Boil sugar into gelatin, pour into bottle, let set. This slows sugar consumption and extends lifespan to 3+ weeks.
Real-Life Results: Before & After DIY CO₂
Tank Specs:
- 15-gallon U.S. nano planted tank
- Low-light LEDs
- Plants: Anubias, Cryptocoryne, Java Fern
Before CO₂:
- Slow growth
- Green spot algae on glass
- Yellowing leaves on new growth
After 2 Weeks of DIY CO₂:
- Faster new leaf production
- Stronger root structures
- Algae reduced by 70%
Infographic Concept: “DIY CO₂ Injection System Build”
Title: Build a CO₂ System Without a Regulator – Step-by-Step Visual
Top Section: Parts & Ingredients
- Bottles
- Sugar
- Yeast
- Airline
- Diffuser
- Check valve
→ Include brand icons like “Fleischmann’s,” “API,” “Aquaneat”
Middle Section: Assembly Steps
- Mix sugar + yeast
- Seal cap and insert tubing
- Add check valve
- Connect diffuser
- Place in tank
Bottom Section: Bubble Count & Safety
- Target: 1–2 BPS
- Add check valve
- Refresh every 10–14 days
- Use drop checker for safety
Colors: Blue, Green (for plants), Orange (warnings)
Common Questions (U.S. Audience FAQ)
Q: Can I run DIY CO₂ on a 55-gallon tank?
A: Not recommended. Use pressurized CO₂ for tanks over 30 gallons.
Q: Can I turn off DIY CO₂ at night?
A: No regulator means no shut-off. Add a check valve + surface agitation at night to offset.
Q: Is it safe for shrimp?
A: Yes—if dosing is kept moderate (30 ppm max). Use a drop checker to avoid overdosing.
References
- PlantedTank.net Community Threads – “Yeast-Based CO₂ Systems Without Regulators”
- Scientific American – Yeast Fermentation Science
- U.S. EPA Guidelines – Aquarium Water Quality
- Rotalabutterfly.com – CO₂ Levels and Plant Nutrient Uptake
Conclusion
A DIY CO₂ system without a regulator is a smart, affordable way to take your aquascape to the next level. With just a few household items and careful monitoring, you can boost plant growth, reduce algae, and improve tank health—without spending hundreds on pressurized gear.
Perfect for beginners, small tanks, or hobbyists experimenting with planted tanks on a budget—this system offers real results for U.S. aquarists.